Contents
We can all agree that Shellac and gel nail paint are the best things to happen to the beauty world since sliced bread. These LED-cured polishes provide chip-resistant coverage and excellent gloss to our nails, extending the life of our manicures for weeks. However, with the highs come the lows. The removal procedure is, well, procedural! That’s why most of us leave it to expert nail artists and technicians when switching from one polish job to another.
But these are odd times. We’ve stumbled into a global pandemic in a matter of days, which means we’re all subject to new restrictions, such as social distance guidelines and temporary closures of spas and salons. What should we do with our gel nails now that we’re all doing our part to stem the spread of COVID-19, which means remaining at home? Nails will continue to grow, pandemic or not, and if your gel manicure is on the verge of falling apart, it’s time to take matters into your own hands—and we’ll show you how.
It’s a frequent myth that removing gel nail paint weakens and harms your nails. Colley disagrees. “When done correctly and patiently, removal does not damage your nails,” she says. Peeling or plucking, on the other hand, is a different affair. It’s enticing and occasionally pleasurable, but it’s dangerous. According to nail artists, “a single peel will destroy at least six [of 50] layers of your nail.” “It’s the most damaging thing you can do to your nails.” Peeling nails frequently weakens them, causing them to become brittle, fractured, and ridged over time.
We asked nail artists to show us how to remove gel polish at home, which she claims can be made in under 30 minutes in most situations. This is equivalent to half an episode of RuPaul’s Drag Race—or whatever 30-minute self-soothing show you’ve been bingeing on since social isolation and alienation became our new reality.
Tool Kit
Many (if not all) of the instruments required to complete the job at home are most likely already in your possession. If you don’t, we’ve provided links to websites where you can order or alternatives you might find at home. Prepare to soak!
What follows is probably already in your cupboard:
- Metalized foil (cut 10, 2-inch squares)
- Towel paper (cut 10 1-inch squares)
- Fully acetone (or acetone-based nail polish remover)
- Cuticle pusher made of stainless steel (or a wooden cuticle stick)
- nail clipper
- hammer buffer
- paint for enhancing the nails
- Cuticle cream (or coconut oil)
Step 1: Lightly file the tops of your nails
First, use a tool to crack the gel polish seal on your nails. Since many different manufacturers of gel nail paint feature non-soak topcoats, Colley thinks this particular step is vital. The seal is broken by filing the nail. In this manner, the topcoat’s barrier can be broken down, and the acetone can perform labor-intensive tasks.
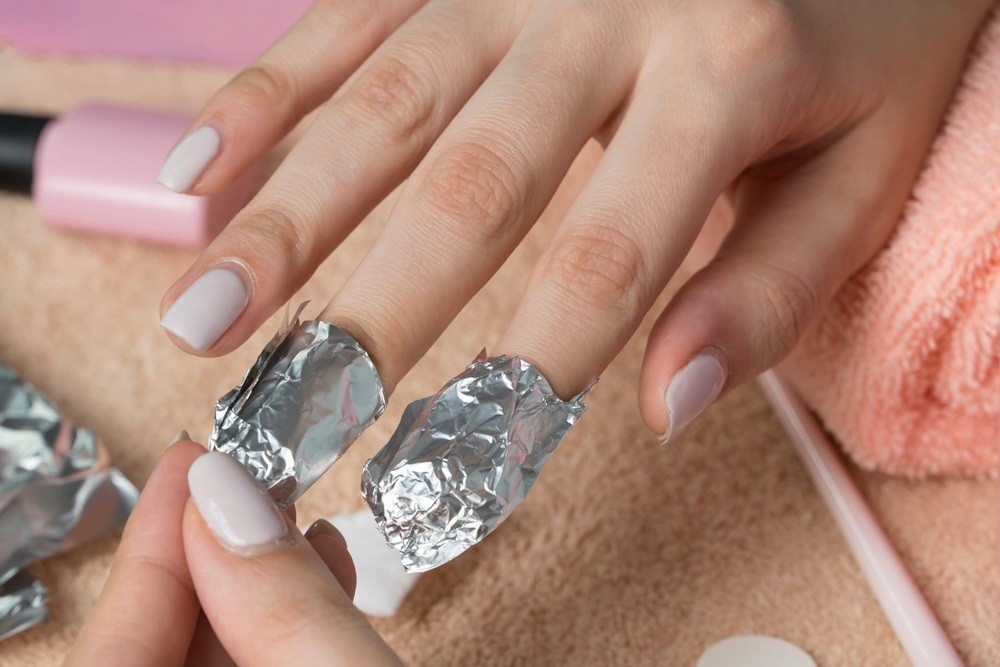
Step 2: Become a wrap star
Nail artists advise working on one hand once you’ve removed the topcoat from each of the ten nails. You set yourself up for failure if you go all in. Immediately, place a tiny paper towel square heavily saturated with acetone on your fingernail. Nail artists advise you to cover the paper towel with a tight wrap of aluminum foil over your finger next, then repeat with the other four digits. “Air will slow the evaporation of acetone. Accordingly, the gel will lift more quickly the tighter you can wrap it.
Step 3: Let them soak.
Nail artists assert that not all gel polishes are created equal. The formulae vary because there are so many brands, and some are more challenging to get rid of. Some even require an hour or more. Though she claims 15 minutes should usually suffice. How do you know when the gel is prepared? “Remove a foil; you should be fine to go if the gel is rising and crumbling.”
Step 4: Remove foils and push
Remove the foil, one finger at a time, and carefully scrape the gel off the nail using a wooden cuticle stick or metal cuticle pusher. Nail artists advised that nails needed more time to soak in the gel polish wasn’t peeling off readily.
Step 5: Buff, baby, buff
Although you could have some rough patches, your nails should appear gel-free. Any remaining roughness on the nail’s surface can be carefully smoothed using the buffer’s less coarse side. Nail artists explain that this procedure removes any extra gel the base coat may have left on your nails. Additionally, it makes them even smoother. On your next hand, repeat steps one through five.
Step 6: Give them some TLC
Moisturizing your nails and the skin around them regularly would be beneficial, but when you’ve removed your gel polish manicure, it becomes much more crucial. Colley advises using cuticle oil, but you may borrow some from your pantry if you don’t have any. Nail artists add that using coconut oil as an after-care [cream] to provide moisture has advantages. According to the expert, whether we have gel-sensitive nails or not, our naturally dry nails need the flexibility to prevent breaking or cracking rather than cuticle oil. If you feel exposed without nail polish, you can add a strengthening substance to the top of your nails. OPI Nail Envy, which strengthens nails with hydrolyzed wheat protein and calcium, is a favorite of Nail artists.