Contents
You could have lately discovered that you have too much free time. Or the contrary is true: you never have time to take care of yourself. Regardless of where you lie on the spectrum, it is our responsibility to ensure you are prepared for the best at-home pedicure when you find the time to paint your toes. With Maby, you can take the initiative in everything.
Of course, a pedicure of salon quality involves more than simply your preferred nail color. Shape-ups, filing, polishing, and even placing flowers in your footbath are all “extra” procedures that can turn a simple coat of paint into a full-on pedicure. We’ve asked expert nail technicians to lay down the steps to a lovely at-home pedicure so we can learn how to replicate the salon setting (and ultimate product) from home. Please visit Maby blog to update the latest nail news.
Set up your workstation first. For the best DIY salon atmosphere, Amy Ling Lin, a nail technician and the creator of the wellness nail-care line Sundays, advises purchasing a footbath. (This Conair model costs under $40 and is fantastic.) Use a straightforward foot tub, such as the Mantello Foot Wash Basin, or just a tiny quantity of water in your bathtub if you don’t have one on hand.
Make sure to establish a comfortable position wherever you are because Lin advises that bending down to reach your feet is uncomfortable.
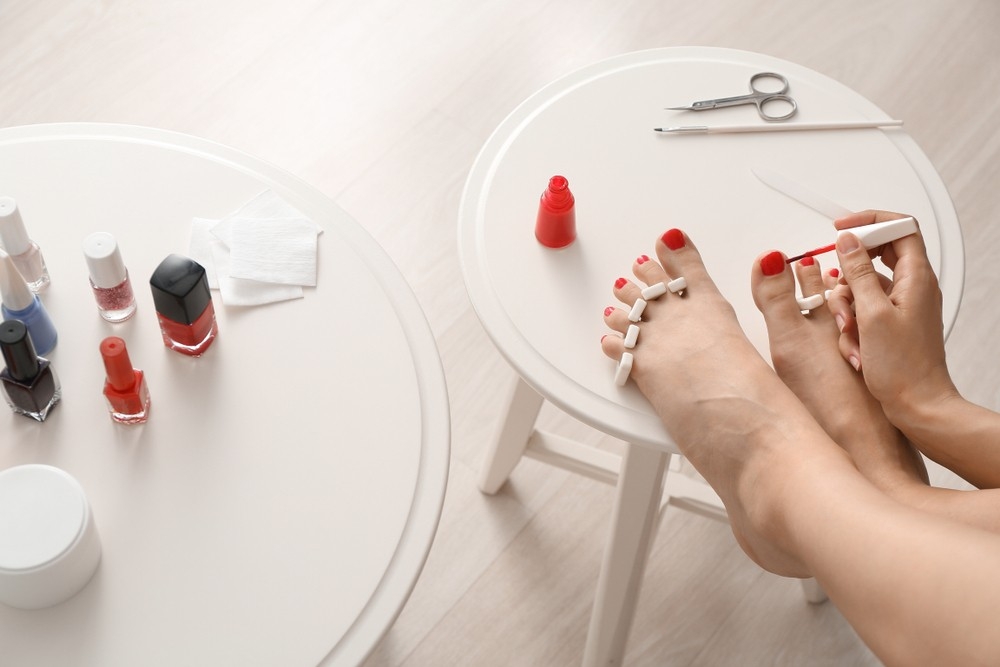
Gather the required equipment once you’ve located a new pedicure headquarters. Lin will also need nail clippers, a nail file, a nail buff, cuticle oil (or body oil in a pinch), a toe separator or paper towels to wrap around her toes, a top coat, a base coat, and any quick-drying oils. (She also developed a kit for at-home pedicures that includes several of these assembled instruments.) A wooden stick or cuticle-pusher that can be used to push cuticles back may also be useful.
1. Remove your old nail polish
Even though it might seem obvious, Lin claims that the way you remove the toenail polish counts. Remove nail polish before soaking since, as she advises, “the polish gets slippery once you get wet, ” making drawing more challenging. The Non-Acetone Polish Remover from Tenoverten is a proven alternative that won’t strip your nails. Gel nails can be readily removed at home, whereas a nail technician in a salon often removes acrylic nails.
2. Soak
Soaking your feet is essential if you want to give yourself a proper pedicure and not simply a nail paint change, according to manicurist Mazz Hanna. “Our hands’ skin and cuticles are substantially thinner than our feet’s skin and cuticles.” An easy approach to removing calluses and push-back cuticles is to bathe rough skin for five to ten minutes.
In addition to preparing your skin and nails for the subsequent processes, soaking is essential to making a pedicure enjoyable. Lin uses mineral salt and aromatic oils to spice up her at-home spa treatments, but creating a unique bath is half the fun. These are some of our favorite bath soaks, which dermatologists also endorse.
3. Slough
Use a foot or nail file, such as the Colossal Foot Rasp Foot File and Callus Remover, to remove dead skin once your feet are nice and soft from the soak. According to Lin, the feet’ sides and rear can be challenging.
According to Hillary Brenner, a podiatrist in New York City, such roughness is often caused by basic physics. She previously explained to Allure that walking puts a lot of strain on our bodies, which can lead to dry feet due to friction with the ground.
To counteract the dryness, towel the feet first. Then, use a file at a 45-degree angle to remove any tough skin. She suggests a 120-grit nail file for those with sensitive skin, or less if your feet are already soft, followed by a foot lotion or body cream to hydrate.
Try AmLactin’s Foot Repair Foot Cream Therapy, which simultaneously moisturizes dry skin with glycerin and exfoliates it gently with lactic acid.
4. Shape and buff
While there are many different fingernail shapes, toenails typically only come in round or square shapes. Pull back a tiny amount of skin to access the corners if you want to file your nails into a rounded form, advises Lin. Repeat the 45-degree filing angle.
Once satisfied with the form, go over each toenail’s surface many times with a nail buffer (we use Tweezerman’s Neon Buff & Shine Block). A polished surface guarantees a smooth-looking manicure with lacquer that adheres, just like fingernails.
Keep in mind that you should never over-buff the nails, advises Hanna. “Many buffers have a 100/180 grit surface on each side. Use the rough grit side to remove flaws that the smoother side cannot address. Additionally, before polishing, if you used the rough side of the buffer, smooth it over with the finer grit side.”
5. Care for your cuticles
Nail artist and founder of JINSoon Jin Soon Choi breaks this down into what you should and shouldn’t do for your cuticles.
Apply cuticle oil, which functions as a softening agent, while pushing back the cuticles, and scrub them gently under running water, she suggests. You can also apply a cuticle remover, effectively cleaning cuticles and pushing them around.
Choi advises if you don’t have access to a cuticle-pushing tool, such as this one from Etude House, “Using your finger, gently press the cuticle back after the area has been relaxed with a soak or cuticle oil. Furthermore, anything smooth and rounded, like the tip of a pen, the back of your tweezers, or the end of a comb, will work. To avoid harm and pain, stay away from anything that is overly hard or pointed.”
On the other hand (or the other foot, as it were), she advises against “trimming your cuticles, especially in excess, because over-cutting cuticles break the protective barrier that prevents bacteria and fungi from forming.”
6. Paint
Before swiping paint in your color of choice, Lin recommends using a paper towel to clean any oil, lotion, or other residue off the nail plate. “Polish will grab any oil on your nail plate, and it may chip easier,” she says.
Once the nails are thoroughly dry, layer on your base coat, like Deborah Lippmann’s All About That Base, which Lin says is “super important” to make the polish last longer.
Then layer on your color. “If it’s been a while since you painted your nails, your best bet is to choose a forgiving natural or sheer shade, as mistakes or uneven paintwork will be less noticeable in a shade likes this,” says Choi.
“The best way to get a professional-looking finish is to paint starting at the top of the nail and gently glide the brush, first down one side of the nail bed, getting as close as possible, but without actually touching the cuticle line.
Next, fill in the middle of the nail. Finally, paint the paint-free edge with an under-saturated polish brush. You’re looking to seal the exposed edge and only need a small amount of paint.”
Once you’ve painted on enough coats to get your desired shade, finish with a top coat — you can’t go wrong with Sally Hansen’s Insta-Dri Anti-Chip Top Coat.
7. Dry
The last thing you want is to smudge your new handiwork. Choi suggests using quick-dry drops to make this final step faster. Typical drying time is 15 to 20 minutes, but remember that the more coats of polish you apply, the longer you should wait to dry.