Contents
Anyone who has ever worn false nails can attest to the fact that maintaining a biweekly appointment at the nail salon is a must, and getting your acrylics removed by licensed nail technicians is always your best bet. It is crucial to be able to remove acrylic nails at home in the event that you are unable to make it to the manicure salon for whatever reason. You may learn how to remove acrylic nails on your own by following this step-by-step method, which is provided below. Proper nail care with Maby blog.
What kinds of materials are need to remove artificial nails?
Make sure that you have all of the necessary instruments before you begin the removal procedure, and schedule at least two hours of uninterrupted time for this do-it-yourself removal (so that you don’t have to halt the treatment in the middle of it). Here’s a supply list:
Nail emery board
Nail clipper
Nail buffer
Acetone is often known as a nail polish remover.
Cuticle oil
Hand moisturizer
A stick made of orangewood is used as a cuticle pusher.
Cotton balls
Aluminum foil (optional)
The Five Easy Steps to Take When Taking Off Acrylic Nails, The Safest Method
It is time to give your nails some attention now that you have all of the necessary products on hand. The removal of artificial nails at home may be done in the following five steps.
1. Reduce It to Its Appropriate Size
The initial stage in the procedure is the one that presents the least amount of difficulty after you have removed the maximum amount of the fake nail plate that you can continue on to the next nail. Be sure to cut off the overhanging pieces since the more nail that is left, the more work you will have to do to remove them in the future.
2. File, File, File, Then File Some More
This requires a great deal of patience on your part. Using a nail file, you should strive to remove the top layer of nail lacquer from your nails. It is preferable to have grains of varied degrees of coarseness, mediums, fineness, and ultra-fineness. When you are getting closer to your natural nail, start with grains that are coarser and work your way down to ones that are finer as you approach closer.
This may be accomplished far more quickly in a nail salon thanks to the usage of mechanical equivalents of the files you could have in your house. However, do not be in a hurry. By taking your time and being meticulous, you will reduce the risk of causing harm to the skin that surrounds your nails, particularly your cuticles and fingertips. (Here’s a helpful guide on taking care of your skin.)
How will you know when you’ve completed all of the filings? Use this straightforward rhyme as a guide: “The finish line is no more shine.” You want there to be absolutely no shine, not even the least bit. Acetone may only be applied to your fingernails at this point.
3. A Comfortable Soak in Some Acetone
If you want the best results possible, the nail polish remover you use should be 100 percent acetone. (Removing nail polish using nail polish remover that has been diluted will need considerably more time and will have far less of an impact). To begin, place the bottle of acetone in a container of semi-hot water to gently heat it, and then pour a trace amount into each of the two tiny dishes. Because acetone is combustible, the only safe way to reheat it is in a warm water bath. Do not attempt to heat it in any other way. During the process, you should also avoid coming into contact with any open flames.
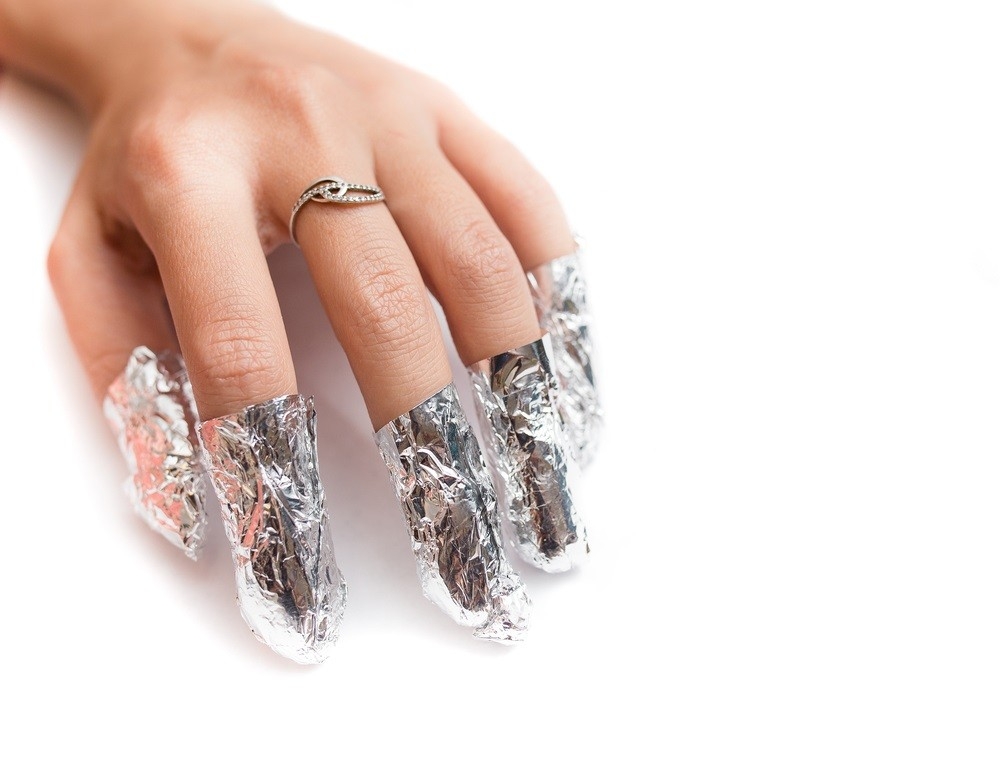
When your nails have been filed down into a flat surface, dip them into the basins so that the nail beds are thoroughly covered. It is not a problem if your skin soaks up the acetone as well; however, you should be aware that acetone can irritate the skin, so you should avoid rubbing or touching your eyes or the region surrounding them. The nail polish must be soaked in acetone for a period of thirty minutes in order to be pliable enough to be removed in the next procedures, which will make those steps much simpler. Those who have sensitive skin will find that the additional waiting time is well worth it. If you are concerned about the acetone causing skin irritation, you can soak cotton balls in the acetone and then lay them on top of your nails. The next step is to use aluminum or tin foil to hold the cotton balls in place, and finally, to finish it off, totally seal the fingertips and the cotton balls.
4. Get a Buff
After you file them and soak them in acetone, your nails will not be in a very attractive state. However, there is no need to be concerned because you have not yet completed the task. With the use of a buffer, remove any leftover fragments of softened acrylic nails. If you do not have a buffer, you can scrape away using a file, a cuticle pusher (or a cuticle stick), or a cuticle stick.
Take care not to mess up this stage of the procedure. If some pieces of the acrylic are stubborn and won’t come off, go back to the soaking phase and give it another shot. When dealing with tougher situations, you should attempt buffing after alternating rounds of acetone. You should be able to do what you want to achieve with some perseverance and by using soaks that last for twenty minutes.
5. Water Consumption Is Crucial
Acetone is a double-edged sword because, despite the fact that it is an effective remover of nail polish and acrylic, it may also be damaging to your natural nail beds. There is no other option available for this than the one with aluminum foil that was discussed before; however, there are certain aftercare procedures that may be of assistance.
In addition to the severe filing and extensive buffing, the acetone also helps to soften your nails while drying off your epidermis. As soon as you are through clipping your nails, wash both of your hands carefully with soap and warm water (not hot water!). This will guarantee that all of the acetone has been eliminated.
Hydrate your hands by massaging them with hand cream (or lotion) and cuticle oil. Hydrate, hydrate, hydrate! When it comes to removing artificial nails, having a higher level of moisture is preferable. You might also give yourself a natural manicure, which will allow your nails to have some breathing room while you pamper yourself. (Acrylic nail polish can cause damage to your nail beds, particularly if it is not applied in the correct manner.)
In addition to moisturizing your nails to the absolute maximum, you should also use a daily nail strengthener. After applying oil, cream, or lotion to your hands, follow up by wrapping them in warm towels that have been dipped in water for a few minutes.
Nail Techs Who Work From Home!
You now have all the information you need on the procedure for removing artificial nails. If you follow this instruction, you will not only be able to remove your artificial nails at home, but you will also be able to maintain your nail beds, ensuring that your cuticles and skin are fed and protected, and guarantee that you do not damage your natural nail beds.
The removal of artificial nails may be accomplished in just five easy steps: trim, file, soak, buff, then hydrate, hydrate, and hydrate some more! This topcoat is the most important item.
Last, but not least, remember to take a vacation from filing your nails. Wait until they have fully recovered before attempting the most recent nail art or gel nail polish trends. Even though your nails are a very small part of your body, paying attention to and properly caring for them can have a positive impact on your overall health. In addition, please refer to: 5 Reasons why nail care is important.