Contents
Our viewers miss their manicurists, stylists, and terminology as much as we do. In this new series, we invite professionals into the homes of Allure readers to provide instruction on managing at-home beauty like a pro—greetings from House Calls. With Maby, you can take the initiative in everything.
Learning how to perform an at-home manicure is a skill that will be useful to you, whether you want to practice self-care techniques or want to avoid paying the money to have your nails done by a professional. Please visit Maby blog to update the latest nail news.
However, having the correct instruments and polishes available does not guarantee a manicure of salon quality. Anyone who has attempted to paint their nails knows that it is more complex than the pros make it appear. However, it only follows that you can learn how to do it. Here, we’ll go through all the steps, supplies, and advice supported by professionals to give yourself the ideal at-home manicure.
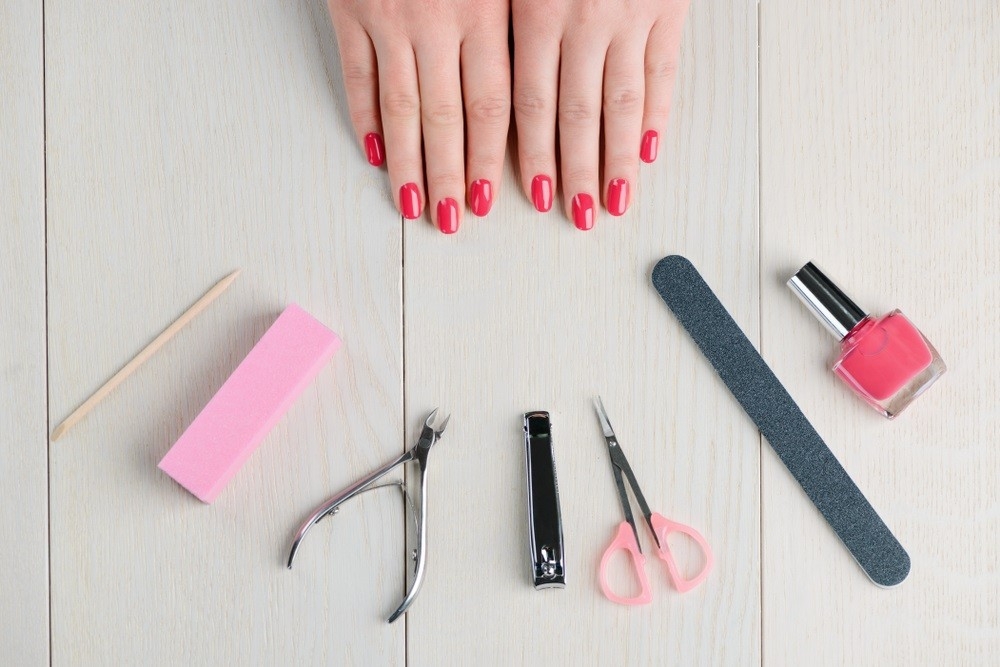
You’ll need to keep particular tools and supplies on hand to care for your nails properly. According to manicurists, these include a base coat, the color of polish you’ve chosen, and a top coat, as well as a nail file to shape the nails, a buffer to smooth the nail bed, cuticle oil to soften the cuticles so you can push them back, and a nail brush to remove the oil before painting. Here are some ideas for Aura nails.
To prevent your nails and cuticles from drying out, the manicurist advises using an oil-based polish remover rather than acetone, which is abrasive and can weaken your nails.
1. Shape
Use nail clippers to trim your fingernails unless you keep them long. Never begin in the center while trimming your nails. The nail technicians recommend starting on the side and working your way across to avoid splitting the nail.
If you have long nails, it’s crucial to begin your at-home manicure using a set of nail clippers rather than attempting to file away the excessive growth.
When it comes to filing, you should begin by shaping your nails into the shape you choose, be it an oval, square, rounded square, or another form—trying to figure things out still? Although the condition of your nails is a question of personal preference, professionals employ the following method.
2. Buff
After filing, you should buff the nails to “create a flat surface” that you can paint on, advises the nail technicians. To polish your nails, move a nail buffer back and forth over each one for a few seconds until you feel the nail is smooth.
If you’re in a bind, you could wonder if this step is required or if you can omit it. However, painting your nails without first buffing them will significantly affect how your polish turns out. They warn that if you don’t start with smooth nails before polishing, they will appear on the painted surface.
3. Care for your cuticles
The nail technicians advise applying cuticle oil directly to the cuticle with your fingertips before gently pushing the cuticle back to expose the nail plate. “This makes the nail appear longer.”
Although cutting the cuticles is a standard part of in-salon manicures, board-certified dermatologist Howard Sobel of New York City advises against doing it at home. Sobel suggests “trying to avoid cutting your cuticles and pushing them back softly.” Incorrect cutting can result in more breakage, rips, tears, and infection in the nail bed. According to the nail technicians, “good nails do not have a break in the cuticle and should not be clipped.”
4. Wash
You should use your nail brush to wash the oil off after you’ve applied it and gently push back your cuticles, which may sound paradoxical. Your nail technician may instruct you to go to the sink and scrub your nails with a nail brush and some sudsy water at this point in the in-salon manicure. As recommended by the nail technician, you can also “wash your nails with a cotton swab dipped in isopropyl alcohol or facial toner.” Both methods guarantee that your nail polish adheres to your nail and does not streak.
5. Lay down your base
It’s time to begin painting at last. To keep your hand steady, Goldstein advises placing it on a table. Start by applying a light coat of base coat polish. This will make it easier to use the color evenly and keep the polish from discoloring your nails. Before moving on to the next step, Logan advises giving the base coat one minute to dry.
6. Two coats of color
The most enjoyable and likely most challenging stage is painting your finish. To avoid dents and bubbles, always apply two coats of color, allowing a few minutes between each coat. According to the nail technician, when using color, start in the center of the nail bed and work your way to the edges in thin, even layers. Additionally, the nail technician advises painting the nail’s tip since it helps seal the color.
As we are all aware, it is frequently simpler to say than to do. According to the nail technician, “the major issue with at-home manis is that it’s just difficult to paint with your non-dominant hand.”
7. Seal it with the top coat
Applying a topcoat polish will help seal your color, make it sparkle, and keep it from chipping. This should be your final step. The nail technician advises reapplying your top coat every two to three days to help keep your manicure looking new and prevent peeling.