Contents
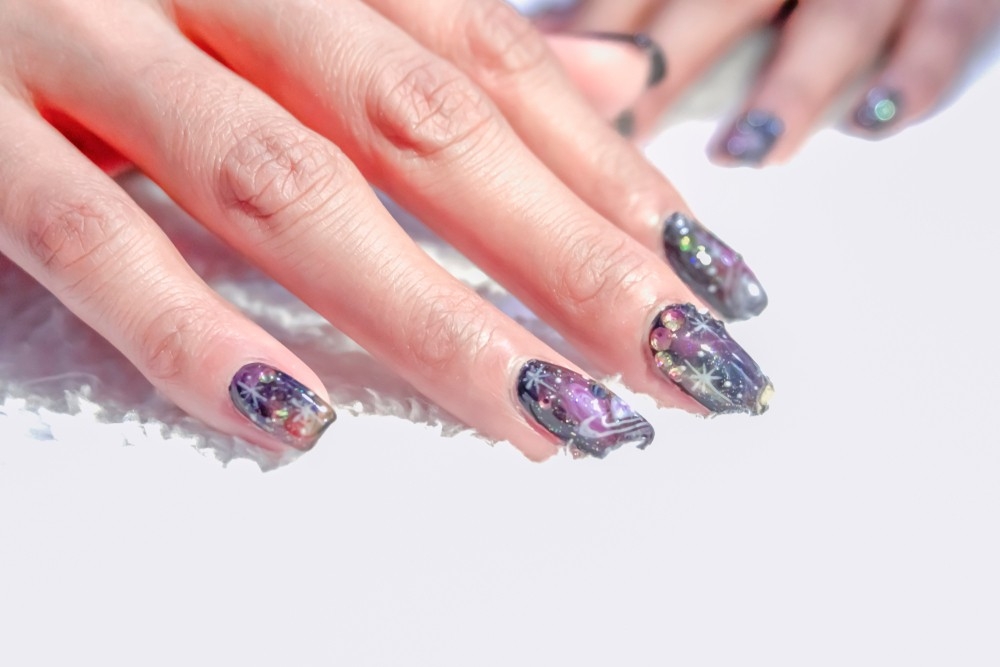
Our attention has been drawn to galaxy nail art on social media for a while now because of its captivating shimmer, ethereal design, and otherworldly beauty. It frequently includes sky-colored hues, glitter, stars, and stellar.
It is adored by purists and nail art addicts and is deserving of its viral reputation. Contrary to popular perception, anyone can have flawless galaxy nail art. Read on how to create the ideal galaxy nail art at home. With Maby, you can take the initiative in everything.
How to do galaxy nail art
Galaxy nail art is more accessible than it may seem if you use a straightforward technique that comprises a sky-colored base, stars, and a glitter top coat. Get inventive and follow this simple guide to create stunning, do-it-yourself galaxy nails.
Prep the nails
Start with clean nails free of lacquer, grime, and oils. Clean up your cuticles and shape your nails, whichever you choose. This preparation will guarantee the durability of your detailed galaxy nail art.
Apply a base coat
Each nail should have a thin coat of base coat applied. Your manicure will last longer if you use a base coat to prevent your natural nails from being stained. It’s a quick action that has long-term benefits.
Choose a base color
Most galaxy nail art begins with a navy, black, or purple base to evoke an alien environment. While it sounds difficult to achieve, a wash of several colors is sometimes used in galaxy looks.
Choose a color and apply a thin layer on each nail like you usually would if you’re sticking with just one. Consider using this simple method for a salon-worthy appearance if you’re picking numerous colors:
Paint the colors onto a clean makeup sponge you no longer require after first grabbing it. Then apply pressure to the sponge to apply an ombré wash of color to the nail. To remove paint that accidentally gets on the skin uses a nail brush and some acetone. This trick can be used on all your nails or just a couple to give a colorful accent. There’s no need to get technical or make things appear flawless.
Editor’s tip: Blues and purples look stunning when paired with pink tones for a galactic-inspired aesthetic. Even a few lines of white nail paint can be added to resemble the Milky Way.
Apply a glitter or shimmer top coat
We’ll tell you a secret: the key to making your galaxy manicure come to life is a little coat of glitter, shimmer, or holographic nail polish. It will be easier to mix all those colors if you select a small number of colors for your basis. Additionally, it conceals flaws and gives your nails an ethereal, star-like sheen.
Add stars
Your galaxy-themed nails can be quickly and simply improved by adding stars to them. Stars come in various sizes, forms, and looks, so don’t stress about this step and have fun with it.
Use silver or white nail paint to make your dark background stand out. Then, outline a star using a liner brush and a small amount of nail polish. Choose a five-pointed star or draw a starburst form with lines for a simple design. Adding a crescent moon is the ideal method to set the starry sky, and tiny dots can also be used to map out the shape of a constellation.
Editor’s tip: There is no requirement to decorate each nail. A flawless and wearable approach to give your unique touch to the style is a galaxy manicure that combines accent nails, nail art, and solid nails. And nail stickers will work if you want to bling it out with stars.
Get 3d with it
Any galaxy-themed manicure is a resounding yes to all the glitter, sparkle, and shine. After painting and using the top coat, you should add any 3D appliques, nail stickers, or rhinestones you may have. Attach them to your manicure using tweezers, nail glue, or a top coat. Rhinestones are excellent for providing eye-catching shine and 3D texture since they closely resemble stars. Another brilliant method to give your nails a galaxy-inspired effect without painting on a design is to use moon- or star-shaped sequins.
Apply the top coat
Your galaxy manicure must be sealed with a top coat once the design, rhinestones, glitter, and any additional stickers are complete (even if you used a glitter top coat). A clear top coat will protect your manicure, smooth out the texture of the glitter, and give you a high-shine, oh-so-glossy finish.
Your galaxy-themed nails are finished! Please feel free to play around with the colors. You may use bright colors for a warmer effect or pair this technique with black polish and silver glitter. Next time, I might experiment with bigger glitter particles for variation. Please visit Maby blog to update the latest nail news.