Contents
The French manicure is returned after an extended absence of several decades. There are various variations on the basic version of this manicure, which features a glossy, translucent pink or nude base with opaque white tips. There are those with a kaleidoscope of colors, those with a more muted palette, and those that draw attention to the tips with unique forms and surfaces.
“The French manicure technique was originated by the legendary Max Factor in Hollywood in the early 1930s and quickly became a favorite trend in Hollywood,” says Deborah Lippmann, celebrity manicurist and founder of the namesake brand. To quote the author, “It was an understated and classic look that complemented costumes without upstaging the look.”
According to her, it wasn’t until the looks hit the Paris runways that the “chic” factor truly took off, and then it became the “go-to” look for hugely successful superstars like Cher and Barbra Streisand.
Whether you’re going for a classic French manicure or want to zhuzh things up, a sharp point of demarcation at the tip is essential. We consulted with experts in the field of nail care to learn their tried-and-true methods for replicating their work at home. Check out the nail tutorial with Maby blog.
Make use of a stamping tool
If you don’t consider yourself a nail art pro, a stamping tool will become your best friend. These stampers are soft and pliable, allowing you to quickly and easily apply a manicure. Some examples are the BlueZOO Nail Art Stamper (available for $6 on Amazon) and the JimiLace Jelly Nail Head Silicone Art Stamper (available for $4 on Etsy).
Manicurist Darlene Sritipan, OPI’s North America education and capability manager, explains: “Simply paint a couple of coats of nail polish in the color you want for your French tips on the nail stamper, then gently push the tip of your fingernail into the stamp at an angle.” She recommends lightly rocking the instrument back and forth to coat the entire nail before removing your fingernail carefully. A superb French suggestion is all that’s left!
Use nail art stickers
Stickers are a quick and simple way to achieve a professional-looking French manicure. Once your base coat is dry, apply a circular manicure sticker under the tip and press firmly to ensure it stays put.
Then, paint it in with the color of your choice for the tip. Sticker provides opportunity to “go wild” while creating artwork. After the ink on the pen’s tip has dried, you can remove the sticker to show a clean stroke. In addition, please refer to: How to Do the Easiest At-Home Manicure using Nail Stickers.
Examine the $5 Orly Half Moon Guides (available at Amazon).
Adopt a rolling approach
Avoid the hassle of searching for and purchasing a stamping tool or stickers by resorting to the tried-and-true method of rolling. Lippmann recommends starting at the nail line and keeping the brush stationary while rolling the finger to the opposite side. The similar method can be achieved by applying polish to a makeup sponge. This maintains a steadier and more consistent environment, reducing the potential for errant lines.
Make use of the Dustpan and Brush
No matter which method of applying a French manicure you prefer, tidying up afterward is essential. The Olive & June Nail Grooming Clean Up Brush ($8; target.com) and the Maniology Angled Precision Brush #105 ($9; maniolgy.com) are two clean-up brushes that Sritipan recommends.
A nail technician’s best friend is a clean-up brush. Sritipan claims that this method is like using a magic eraser to get rid of unsightly nail paint. If, for instance, you find that your line is excessively thick, you can dilute it by wiping off some of the nail polish. You can also use the clean-up brush to get rid of any nail paint that ended up on your skin by accident.
Simple use involves dipping the brush into the remover, wiping off the excess, and then tidying off the edges.
Don’t rush things, take your time
The key to a flawless French manicure is preparation and time. To make your manicure last longer, Lippmann recommends using a good base coat as a foundation. The next step is to examine your nails before applying the tips to decide where the color will go.
“You want to apply the polish to the actual white part of your nail and follow the line across,” says Lippmann.
Wait for the color to dry after applying it. Applying the sheer top coat before the tip has dried, as Lippmann claims is a common mistake.
She notes that doing so contaminates the clean pink application and maybe the next nail since the white is transferred from the brush.
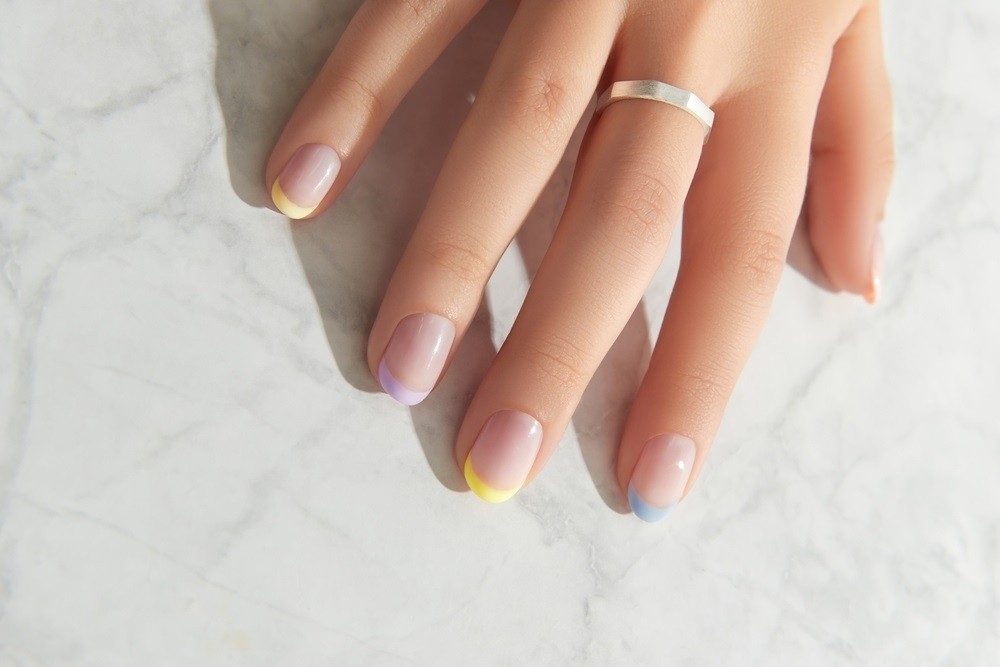
French manicures are typically done in white and pale pink, but there are countless more color combinations that work just as well. Experiment with contrasting hues, different textures, or inverted forms.
Lippmann says, “I have always seen nail color as a way of self-expression, and I really enjoy how people are experimenting beyond the boundaries of white and sheer shades.” The freedom to experiment is what makes the French manicure so enjoyable, she said.