Contents
There is always a moment to learn how to do a manicure at home, whether you’re trying to save money or are still hesitant to visit the salon. The act of painting your nails can be soothing in addition to being utterly satisfying. Without considering health and safety, the idea of staying home is seductive. It can be challenging to achieve the same effects at home that you’re accustomed to at the salon, even if you’ve been addicted to DIY manicures over the past two years.
Many things can go wrong with a DIY manicure, including chipping, warping, glops, bubbles, and smearing. Wait to start on the possibility of spilling nail polish all over your couch when you zip up your slacks, change the channel, or respond to a text. There is a lot of chance for error, from cleaning your nails to selecting the right color. The stakes are much greater if you’re trying something fancy like a gel manicure, experimenting with cute nail art, or learning to do a French manicure. With Maby, you can take the initiative in everything.
However, learning how to perform a manicure at home is relatively easy. You can achieve much with effort, persistence, and the proper nail tools. We asked famous manicurists to share their top self-manicuring nail tips so you can paint your nails like a pro to help ease your DIY concerns. It turned out to be simpler than we anticipated. It only requires ten easy steps. Follow along for a mani that’s such good people will ask where you got them done. Your secret is safe with us, so don’t be concerned. Proper nail care with Maby blog.
Step 1: Make sure to remove the polish from your nails
Spend as much time caring for your nails as you polish them to achieve a professional manicure at home. To do this, start with a quality nail paint remover. It swiftly removes all lacquer and glitter and contains vital nutrients to help your nails grow stronger and keep your cuticles moisturized. Even if you don’t have polish on, you should still wipe each nail with a remover to eliminate any oils or dirt that could cause your polish to crack. Remember to wash your hands afterward with soap and water.
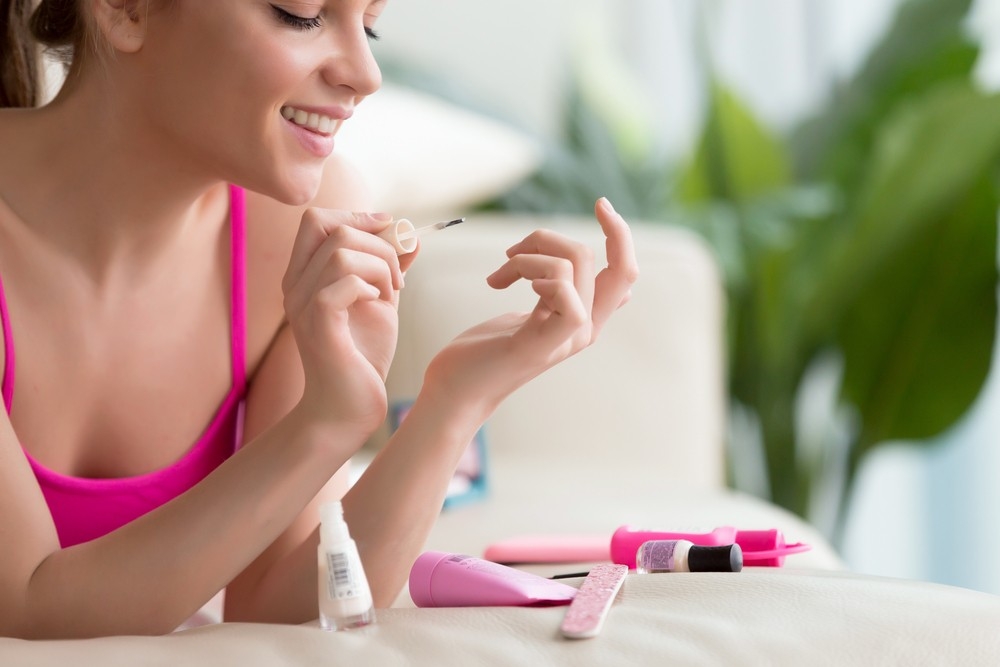
Step 2: Clip, file, and buff
This is the time to use your manicure equipment. If necessary, first file your nails. Once your tips are square, round, or somewhere between, gently rub while working in one direction. Posses short nails? The nail artist explains, “This enables you to see precisely what you’re doing and aids in preventing overfilling.” Finally, use a nail buffer rather than an emery board to lightly buff the tops and sides of your nails to achieve a smooth finish. The natural oils in your nails might accumulate if you don’t file, damaging your manicure by leaving behind residue. Like cleaning your teeth, polishing your nails removes ridges, brightens them, and gives them a younger appearance.
Step 3: Push back your cuticles
Cuticle remover can assist in dissolving dead skin and soften the area, so make sure it’s not an oil or a balm when you prepare the cuticles. Contrary to popular misconception, cuticle oils and removers are not equivalent and cannot be used in place of one another. While removers are an exfoliating treatment for your nail beds, oils assist hydrate. Then use a cuticle stick to push back gently. We recommend adding them to your at-home manicure kit because they’re the best for cleaning below nail tips. Avoid trimming your cuticles because they keep your nails smooth and protect them from bacteria.
Step 4: Exfoliate your hands
Apply scrub to your hands, wrists, and forearms to remove dead skin cells and restore moisture. Grab your orange stick once again to remove any dirt or grime under your nails gently. After that, wash and completely dry your hands.
Step 5: Moisturize your hands and cuticles
To prevent smearing almost-dry nail paint later, moisturize now. Take advantage of the chance to give your hands a little massage; just because you aren’t at a spa doesn’t mean you can’t unwind for a moment. Finish by wiping each nail clean of any remaining polish.
Step 6: Apply a base coat
Before applying, you should see the signs you need to take a break from doing your nails. To protect, moisturize, and prevent chipping, apply a base coat. Next, relax for a while. Essie Weingarten, the company’s founder and foremost authority on nails, suggests allowing two full minutes to pass between each application, beginning with the base coat.
Step 7: Apply your first coat of color
Now comes the fun part: paint your nails with a coat of your favorite color, making sure to reach the cuticle and nail corners with the brush. The first coat should provide maximum coverage to make the second coat simple. Just maintain a thin coating. Thea Green, the founder of Nails Inc., claims that many of us use too much pressure and make too many strokes. The secret is to load the brush with just enough polish for one coat to cover the nail. She advises striping your nails three times, once on each side and once down the middle.
Step 8: Apply your second coat of color
Apply the second coat of nail paint after two minutes. For seamless coverage, a third coat may be necessary for sheer or pastel colors. Just keep it as thin as possible. Alternatively, if you can’t wait, consider using press-on nails.
Step 9: Finish with a top coat
Take advantage of the topcoat, or you’ll drastically reduce the durability of the paint job you just put so much effort into. It keeps your manicure from chipping and adds shine to your nails. Any adorable nail art you’ve tried needs to be secured. Be cautious when applying your topcoat because a sloppy application can damage your entire manicure. The manicurist adds, “I see this all the time. “Women believe: You can’t tell; it’s obvious. But in truth, you can use it once it dries.” The cause? Topcoats shrink when they dry, which might result in those little ridges if they are not applied correctly.
Step 10: Trim any protruding edges, then let your nails dry
Wrap a cotton ball dipped in nail paint remover around the end of your cuticle stick and delicately trace around your nails to smooth out any kinks or uneven edges. Try folding one of your nail paint remover pads into a triangle for a more exact application. Then let your nails another five minutes to dry. It will be worthwhile when you show off your nails and surprise everyone by telling them you DIYed them.