Contents
- How a manicurist will repair your split acrylic nail
- Wrapping a broken nail: step-by-step instructions
- The equipment a manicurist must have
- Home remedies for a cracked acrylic nail
- How to replace a damaged acrylic nail with a natural one
- Instructions for repairing a cracked acrylic nail below the free edge
How do you fix a broken acrylic nail? Do you need to see a nail technician to get a broken nail removed? In this article, we’ll go over some solutions for mending a chipped or broken acrylic nail.
The feeling of a brand new manicure is unparalleled. Manicures are aesthetically pleasing but can cost as much as a full pedicure. If you break or crack an acrylic nail, knowing how to fix it will save you time, money, and your nail.
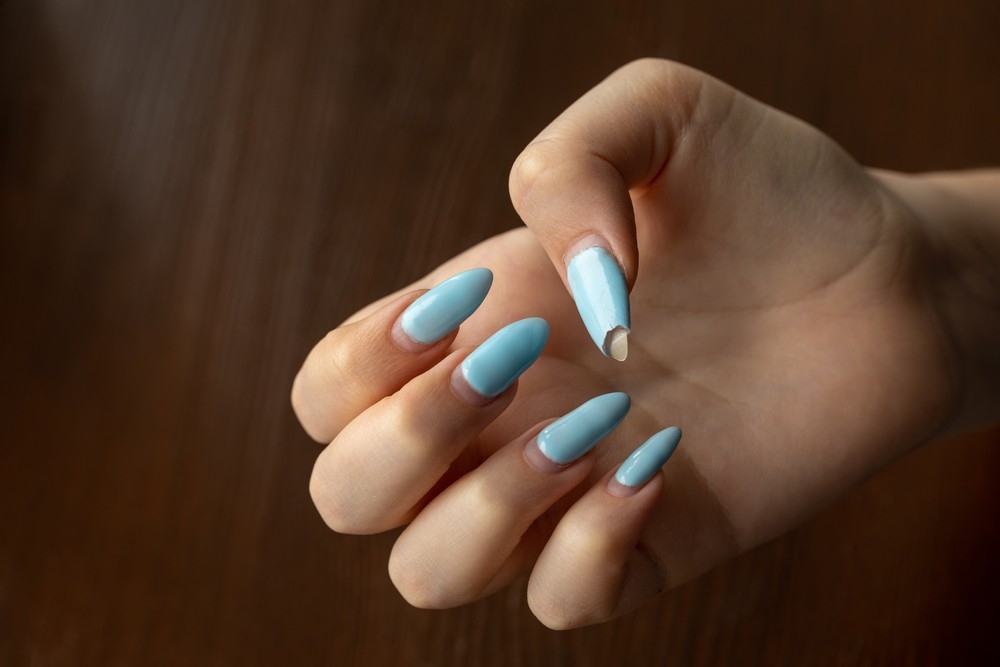
One of the worst things that can happen to a beauty addict is for one of their acrylic nails to break. In addition to the discomfort of a broken nail, the disappointment of having to replace your brand new, professionally done nails may completely destroy your day.
Fortunately, the next time you crack one of your nails, there are techniques to cure it. You can get by with a crack in the centre or on the side of your nail until your next appointment.
If the damage to your nail is extensive (more than half the nail), you should probably take it off and replace it with a new one. Make sure you don’t hurt your nail plate by pulling at the split. Proper nail care with Maby blog.
How a manicurist will repair your split acrylic nail
A nail technician can usually fix a broken nail in less than five minutes. Make an appointment with your nail technician as soon as possible if the problem persists. Here are the procedures a manicurist will go through to fix your chipped acrylic nail:
Step 1: toenail filing
They’ll file the region around the fracture with a thin board to make it longer and wider. They’ll file until the natural nail is exposed. If your nail has cracked and lifted, they will additionally apply acrylic around the break. Nippers are often avoided by nail professionals because of the damage they can do to a natural nail.
Nail techs may also utilize drills to speed up the filing of the damaged nail. Since carbide bits don’t overheat as easily as other bits, they’re the ones typically used. A conical carbide bit is typically used for crack repairs of this size.
Step 2: repair the tear by inserting glue
They will also apply a tiny coating of adhesive to the shredded portion of your nail under the fracture. Putting glue directly on top of the tear will only make it worse.
Your nail tech will likely tell you that they need to put adhesive in the tear to prevent it from spreading and becoming more painful.
Step 3: sweep away the nail dust
Step two entails having your nail technician file down the acrylic surface of your nail and then use a manicure brush to get rid of the dusty residue.
Step 4: primer use
After that, your nail tech will prime the bare nail. Applying either too little or too much primer to the broken nail could make it more difficult to repair.
Step 5: insert acrylic ball
After filing down the split, your nail tech will insert a slightly damp acrylic ball into the resulting void. The acrylic ball will be patted firmly but gently into the opening, and the nail surface will be brushed to smooth it out. Once the crack is filled, a tiny acrylic ball is brushed over the entire nail.
Step 6: buff and file the nails
Your nail technician will then buff and file the surface of your nails when these procedures are finished. They may cut the nail shorter to ease the load on the patched region. They will even repolish your nails if you ask!
Wrapping a broken nail: step-by-step instructions
Your technician may use silk wraps, patches, or fiberglass to fix your damaged nail. What they do to remedy it is as follows:
Filing the nails
It makes more sense to have them file down your other nails to the same length if the break isn’t too far from the free edge. If they see that your cuticles are infected or that your fingers are irritated, they will not fix your nails and will likely suggest that you consult a doctor.
Nail polishing
The next step in getting professional manicure is having your nails filed and polished. Nail buffing is done to roughen the nail surface, making it more receptive to the silk patch or fiberglass.
Use rubbing alcohol
They’ll use rubbing alcohol spray to disinfect your nail. When you’re done filing your nails, use rubbing alcohol to clean up the mess.
Cover in silk or fiberglass
The nail tech will next remove the damaged portion of your nail and replace it with a piece of silk wrap or fiberglass. They’ll cover the broken part of your nail with a small piece so it doesn’t irritate your skin.
Nail glue application
They’ll use nail glue after that. Nail wrap or fiberglass is soaked with glue, then dried in a glue drier.
Polishing and clear coating
The final step is to buff the patched area till it’s smooth. Your nail technician will buff the mended area once the nail has dried. A final layer of polish or topcoat will be applied.
The equipment a manicurist must have
Your nail tech will use the following tools and supplies to swiftly and easily repair your acrylic nail if it has cracked:
Nail glue is similar to but thicker than super glue; once applied, it dries quickly.
To get your wrapped nails ready for polish, your manicurist will use a high-quality nail buffer to smooth them out.
Both adhesive silk wraps and fiberglass are high-quality materials, but many professionals have found that fiberglass offers greater flexibility and durability.
Files: Your nail technician can swiftly smooth up cracks by using files of varying grit.
Home remedies for a cracked acrylic nail
If your acrylic nail has chipped, you can patch it yourself!
Step 1: cover the hole with a tea bag
The first step is to fix the crack in your nail. You’ll want to find an appropriate material for this. If you have a nail that has cracked, a teabag is the greatest home substance to use to patch it together. The material used in teabags is sturdy and can handle a lot of weight without breaking.
To use a tea bag as a bandage, simply trim it to size and test it over the opening. When you’ve completed that, you’ll be ready to go.
Step 2: glue the tea bag shut
The next step, after trimming your teabag to size, is to glue it shut. To repair the crack, remove the teabag and dab some adhesive on its surface. Carefully reposition the paper over the split and allow it to dry.
Step 3: put it away until it’s even
When the ink is dry, file the paper until it’s uniform in thickness. Acrylic nails can be painted over as well. Although it won’t last forever, this temporary fix should get you through till your next professional manicure.
How to replace a damaged acrylic nail with a natural one
Trim and file the acrylic piece as close to the crack as possible if your natural nail is unharmed. If the crack is below the free edge, you can fix it by filing it down and then removing the acrylic along the crack with acetone. This will expose your natural nail tip. Avoid getting acetone in any open wounds. It burns!
After your natural nail has been prepped, you can re-expand the acrylic to the same length as your other nails. You might also choose to leave that nail shorter and then trim the others to fit. This is a great way to get your feet wet if you’ve never tried making acrylic nail extensions before.
Instructions for repairing a cracked acrylic nail below the free edge
If your acrylic nail breaks and your natural nail is damaged, it may be necessary to remove the acrylic before the problem can be fixed. Nail breaks are painful, so freeze the area and take some pain medication as soon as possible.
While it may be unpleasant, removing an acrylic nail entirely is necessary if you want to avoid infection. If your natural nail is chipped or broken, it leaves the incision open to contamination from bacteria and fungi, increasing the risk of infection. Soap and water, then a skin disinfectant or alcohol, should be used to clean the affected region.
Applying another artificial nail over a cut increases the risk of infection by trapping fungus and bacteria between the acrylic nail and the actual nail.
When an acrylic nail cracks, it may be a nightmare, especially if it happens at a very hectic time. This post has provided a primer on the steps to take whether you choose to fix it yourself or visit a professional nail salon. In addition, please refer to: What Are Green Fungi Beneath an Acrylic Nail?