Contents
The last thing you want to see when you glance down at your hands is a slithering serpent, yet nail art makes that appearance unavoidable. Even if you still have a severe phobia of snakes, you must admit that snake-themed nails are cool. It looks edgy and is simpler than you think to paint a snake across your fingernails. Here, we’re presenting two ways to rock this reptilian nail trend: one with a whole snake and the other with a stylish snakeskin print. With Maby, you can take the initiative in everything, visit the Maby blog to discover the most trending nail art today.
How To Create a Snake Design On Your Nails
Step 1: Start With a White Base
Paint each of your nails white and layer the polish until it’s opaque.
Step 2: Create a Snake-Like Squiggle
Draw a curved line connecting the nails on your ring, middle, and pointer fingers using a small nail art brush (or a paintbrush) soaked in black nail lacquer. Although it doesn’t need to be flawless, this will serve as the snake’s base, so pay attention to getting the essential positioning and curve right.
Step 3: Thicken Your Lines
Use the same brush to pick up other black nail paint. Make the squiggle you made more prominent so that it resembles a snake. Keep one end narrower for the snake’s tail and the other thicker for the snake’s head.
Step 4: Add Details
Use a little brush to paint a tiny tongue protruding from the head’s end. Split it into a fork at the end for a spooky finishing touch. The tongue might be red if you want to draw more attention to your embellishments or black if you prefer a monochrome effect.
Then, draw two white eyes on the head with a dotting tool. You can leave your snake as-is or add tiny particles to its body using your dotting tool and white nail paint.
Step 5: Finish With a Topcoat
Every nail art creation should come to a close with a coat of topcoat. This will make your design look smoother and help your manicure stay longer.
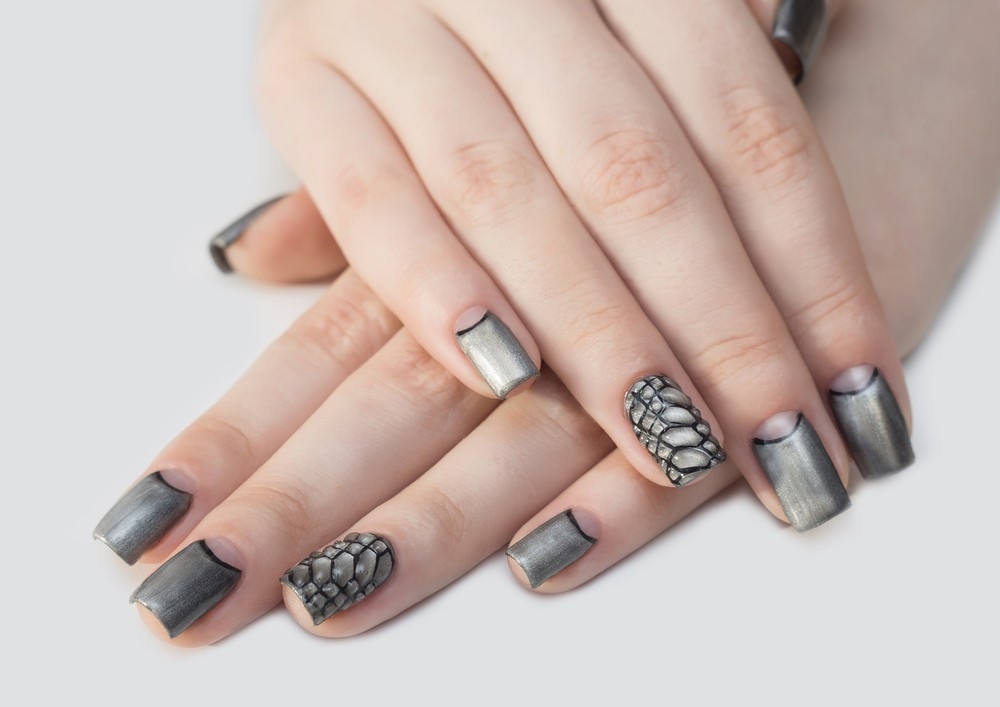
How To Do Snakeskin Nails
If you’ve seen someone rock snakeskin nails, it’s unlikely they did it by hand. One nail pattern, in particular, is rarely created by hand. Using nail stickers or decals is the most common method for creating snakeskin-print nails. It works well and is simple.
Utilizing a snakeskin-patterned nail art stamping plate is an additional choice. The nails are painted, giving them time to dry completely. The plate’s design is then covered in polish, and any extra is scraped off with a unique tool. The design is immediately transferred to the stamp by pressing a stamp against it. To move the pattern to the nail, the stamp is rolled and rubbed on it.
How To Care For Your Snake Nails
You don’t want your skin to have a snake-like appearance, regardless of how you get a snake-inspired manicure design. Even if your manicure fits the serpent concept you’re striving for, dry, scaly hands can greatly detract from the look. The law of attraction applies here, as snake nails look best with soft, well-hydrated hands.
This balm can be used on more than just your hands. Try using it as a face moisturizer after giving your cuticles some TLC. Its extremely nourishing recipe is ideal for skin during the winter.
The Best Ways To Make Snake Print Nails
The snake sheds its skin to exhibit a sleeker, shinier appearance. People continuously update their hair, nails, and apparel to create new images. Health and happiness depend on change and growth.
Matte snakeskin
To create matte snake skin nails, arm yourself with your preferred shade of gel polish, a UV lamp, and clear matte gel. Use a fine-point detail brush to apply a snakeskin pattern on your nails. To create a subtle snake design, pick a pale polish hue, like peach or pink. Choose a dark or shimmering color to intensify the intensity of snakeskin nails if you like a more dramatic appearance.
Magnet gel snake print
When you design these green magnet gel nails, women will swoon in envious gaze at the scale pattern’s gold rim. The design is as bold as a python so that it might be seen as touch-threatening. The guide here explains how to create the color and snake print design.
To know more, you can read: Nail ideas for Animal Print Nail Art Designs
Snake decal
Applying snake decals on nails can convey a message of strength, enticement, and seduction. To ensure that the decals “pop,” choose a light base color and then apply a shimmering gel. Use water and tweezers to cure the polish before putting the decals.
Floral snake
With this floral snake pattern, you may slither into spring while looking gorgeous in pink. Use Daily Charme flower water decals and Presto pink speckle gel polish to create the look. Does making a snake design out of floral decal paper sound challenging?
Magical garden
Red gel paint and a fine-point detail brush incorporate a snake into this vivid botanical print. Alternatively, forgo the red paint and replace it with 1.2mm gold snake charms. The symbolism of a snake in the garden can be interpreted in various ways.
Foil snake print
Applying snake print transfer foil to your nails will achieve a bold, sassy, and unforgettable aesthetic. At the same time, indeed, putting the foil can be challenging.
Snake print using mesh
Use a mesh bag to elevate a snake pattern nail design to a new level. Apply the base color, allow it to cure, then add the no-rub chrome gel. Make contact with the chromium gel with the mesh bag.