Contents
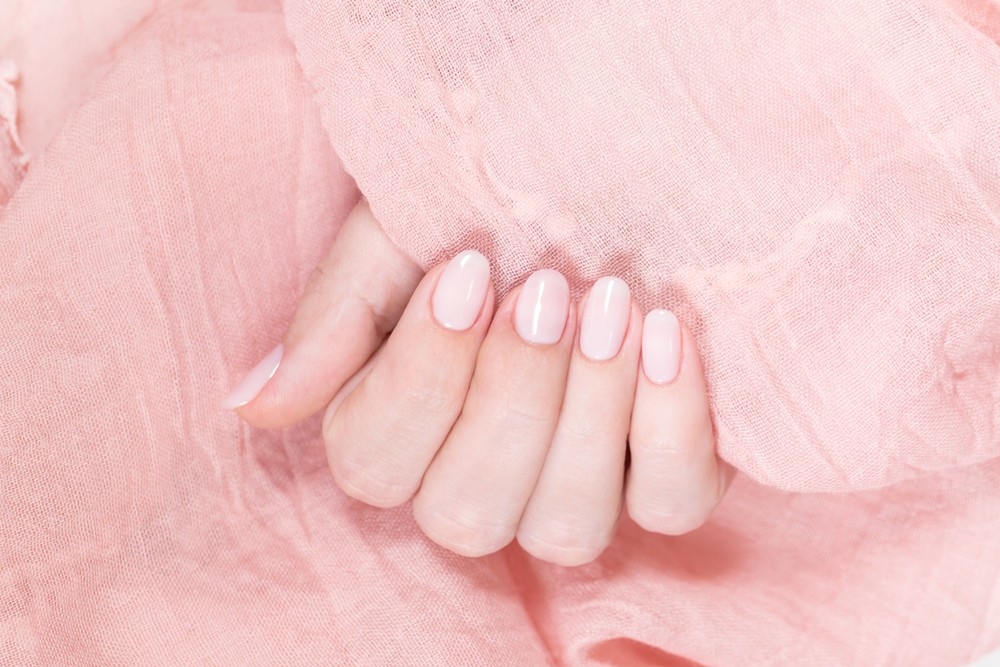
Be it a Brazillian, French, or Acrylic manicure or the famous checkerboard nail art pattern, and nail styling has been synonymous with style statements. Stylized manicures have been ruling the beauty domain for a long time, thanks to our fashionistas and celebrities. Not only are many Hollywood actresses vast fans of nail art, but our Bollywood diva Kareena Kapoor also swears by sassy, stylish nails. Recently, this style trend was all over the internet when famous Hollywood actor Hailey Barber wore them at an event. An off-white pearly look manicured look, milky nails have been making quite some noise. Enameled in light tones with a light yet glossy finish, the milky nails trend has this unique name due to its subtle, milky-looking effect.
While there’s nothing quite like a bold, vibrant manicure, there are occasions when a classic, understated look is preferable. If you like the latter, you’ll enjoy the most recent manicure fashion, milky nails. We’ve seen many milky white nails on Pinterest and Instagram, and we’re a little addicted. There is more to the movement than simply dousing your nails with white manicure varnish. We swear it’s on the list of easy yet fashionable manicure ideas, even though it’s more complex than a single layer of polish. Learn exactly how to DIY the milky manicure trend with milky white nail paint in the sections below. With Maby, you can take the initiative in everything. Please visit Maby blog to update the latest nail news.
What are milky white nails?
Recently, we have seen this nail trend on some of our favorite celebs and all over social media for a good reason. Between a sheer white manicure and an opaque white manicure, milky nails meet. The outcome? A stunning, semi-transparent white manicure aesthetic that, as you can undoubtedly imagine, resembles milk. There are other variations of the trend, but if you search for long acrylic nails with off-white and nude tones, you’ll find them at the top of the results. Are you already smitten? Undoubtedly, we are. With our detailed directions, you can make an at-home version of the fad if you want to try it.
How to get a milky nail look?
Ready to DIY your milky white nail look? Here’s what to do. Follow along with the nail tutorial below:
What you’ll need
Cotton swab
- Clear press-on nails
- Nail glue
- Nude nail polish
- White nail polish
- Makeup sponge
- Nail polish remover
- Top coat
Get the look
Step 1: apply your nails
To ensure that you begin with a clean, bare area, apply nail polish remover first. Apply false nails made of clear acrylic using nail glue next. You may obtain the slightly sheer appearance associated with milky nails with clear acrylics.
Bonus: shape your nails
While it’s not required, you’ll discover that most milky nails have a lovely coffin form. This nail has a straight-across filing but curls slightly inward as it gets closer to the tip.
Step 2: grab your polish
Next, paint each of your nails with a thin coat of naked nail polish. Here is when things start to become trickier. To achieve the milky nail appearance at home, utilize an ombré nail method. Apply white nail polish below the nude nail polish on the edge of a makeup sponge. Then, lightly push the sponge’s edge away from the cuticle and onto your dry, bare nail. The outcome should be a gradient effect changing from white to nothing at all.
Step 3: build your look
Apply white polish to a fresh cosmetic sponge, then press it against the end of your nail. The idea is to create a more solid, white appearance at the nail’s tip and a sheer, naughty hue in the cuticle area.
Step 4: clean the edges
You’ll probably have white nail polish on the sides of your fingers from using the makeup sponge after your nail polish has dried. Fortunately, a straightforward cure exists. For a clean manicure, carefully wipe away any nail polish that has gotten on your skin or cuticles with a cotton swab dipped in nail polish remover.
Step 5: apply a top coat
You wouldn’t want your milky nails to break too soon, would you? Apply a clear top coat to prolong the life of your DIY manicure. Use one with a high-shine finish to complement the sheer, milky appearance.
Step 6: moisturize
Once the polish phase is complete, and the nails have had ample time to get dry, finish your manicure with cuticle oil, followed by a rich hand lotion for softness. Once this is done, you are ready to nail it down!
For love for nail art, this trend is ready to prompt you, and we bet you are on your way want to trying this out. However, here are some essentials that your manicure kit must possess if you want smoother hands and bright nails. Foray into this infographic to learn more
To know more, you can read: Tutorials For Dyeing Your Nails Psychedelic